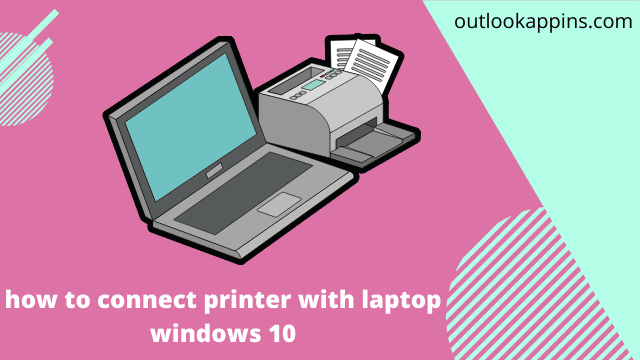
how to connect printer with laptop windows 10, If you are adding a printer to your laptop or computer with windows 10, it is user friendly these days just you have to have a little bit of technical knowledge. You can add printer via USB, any wireless network or Bluetooth in this article we will talk about how to connect printer with laptop in windows 10
Related Article: Combining PDF Files; why is it important
Add a Printer in Windows 10 Via Wi-Fi
For Some reason your-network capable printer is not automatically detected by the windows then you have to set it up manually. You have to go to your printer menu then configure a TCP/IP a port, then install the drivers. below here we will break it in 14 simple steps and those steps can also be found at online manuals like manualsnet.com, so you can understand it better.
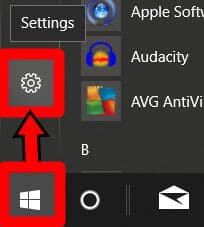
1 Open Window-start Menu
In the bottom left corner of your laptop screen you will see a logo similar to windows you have to click on it
2 Then clicks the Settings
Here you will see a gear shaped icon just above the power button you have to click on it.
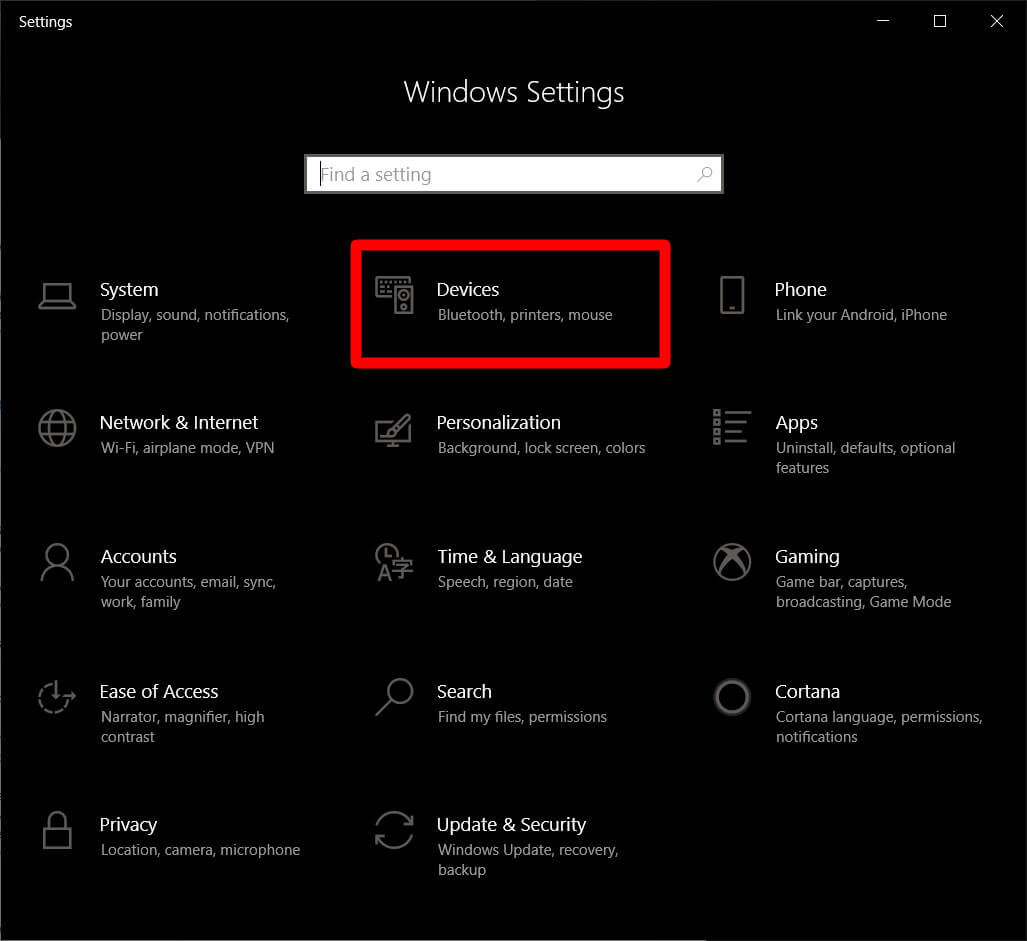
3 Now Click devices
Now you have to go to devices
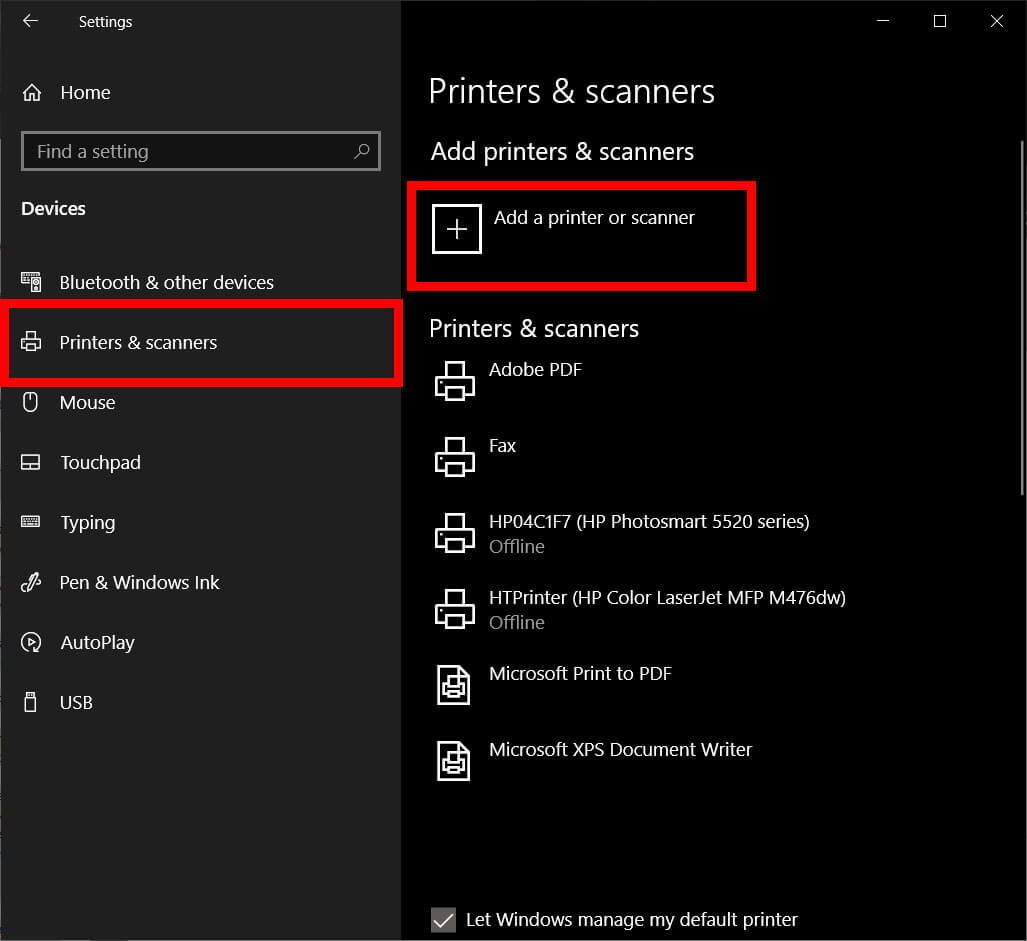
4 Now, select Printers & Scanners
On the left sidebar you will find printers and scanners just click on it
5 Now click Add a Printer.
Now you will see a option add printer you have to click it.
6 Now Click The printer that I want isn’t listed.
When you will select that, the “Add Printer” will pop up on screen.

How Do I connect my canon mx490 to my phone?
If you are facing problem with canon mx490 wireless setup we have explained Every detail below
Firstly Connect the printer with a device using a wireless router. The other thing you need to know is Connection methods vary depending on the wireless router type you are dealing with.
If you want You can change network settings SSID and also security protocol on the printer.
Finally When you establish the connection between a device and a wireless router and Wi-Fi icon (Wi-Fi icon) is displayed in the device’s screen, Then you can connect the device to the printer using the wireless router.
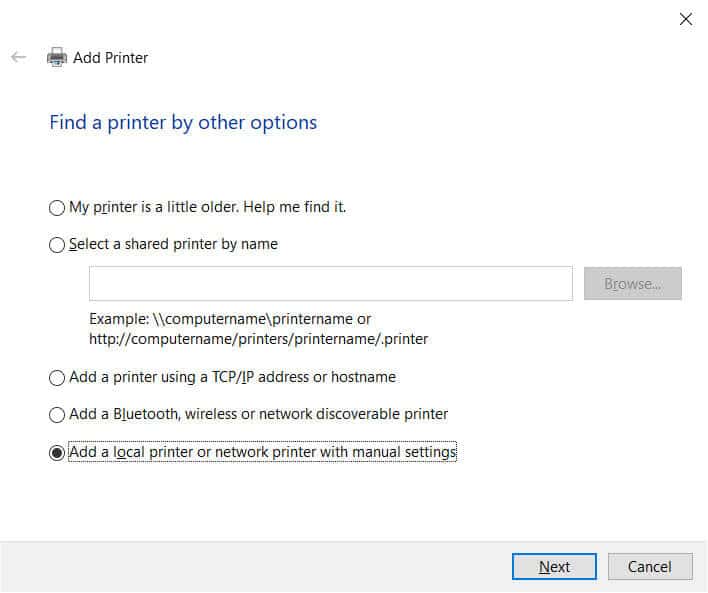
7 Now Add a local printer or network printer with manual settings
Now select Add local printer or network printer with manual settings and then click next.
8 Now “Create a New Port” and select Standard TCP/IP from the drop-down menu.
As mention above create a new port and choose standard TCP/IP from drop-down.

9 Now Type in your printer’s IP address and then click next.
Now at this stage, your computer will try to detect the TCP/IP port. This process may take some time so you have to be patient.
10 Select the appropriate device type.
Inside the drop-down menu for Standard Device Type, Now choose the device type that corresponds with your printer brand. For example, if you are using a Canon printer, choose either Canon Network Printer or Canon Network Printing Device. After that Windows will detect the driver model. Here You will notice that once it detects the driver, after that your printer will be added to the list of devices in the Printer & the Scanners menu.
11 Install the print driver.
Here you have to Choose your printer manufacturer on the left-hand side column and the driver for your printer model in the right-hand side column. Then Click Next.
12 Select Use the driver that is currently installed (recommended)
After selecting the above option simply click next.
13 Set up optional preferences.
In this option you have to Type a printer name if you want to. Otherwise, just click Next. In the next window, you can also set up set up printer sharing if you want to. Whenever done, click Next.
14 Print test page.
Finally You will get a message that you have successfully set up your printer. From here, you can print a Any test page or just simply click on Finish.

Hello, My name is Shari & I am a writer for the ‘Outlook AppIns’ blog. I’m a CSIT graduate & I’ve been working in the IT industry for 3 years.