How Conditional Formatting In Outlook, conditional formatting is a real game-changer for users who want to be able to identify, format and separate their data however they wish.
Conditional formatting provides users with the ability to create their own great features.
The majority of users find that the search tab within Microsoft Outlook is a convenient method to locate particular emails, as opposed to combing through their whole inbox for keywords.
Here in this article, an email message received today with the subject line “Searching for Products?” had all of its words identified using conditional formatting rules to highlight it in blue.
Conditional formatting rules work like a pipeline that highlights or changes the background color of any email you get (including your inbox) if they pass a set of criteria pre-set by the user.
Let’s take a look to explore more about conditional formatting for multiple words.
How to use color to identify incoming Outlook messages having specific word(s)
You can set up a rule that changes your email address and name to appear in red and in bold if the word fire hydra is present anywhere in the subject line or body.
An example of this would be if you wanted an email with the words “mail smartly” in the subject line or body of the message. Tutorial below explains how to do that step-by-step.
- First open Outlook then Go to the inbox of your selected email address in case of multiple emails.
- Now click view tab from all tab menu above then view setting
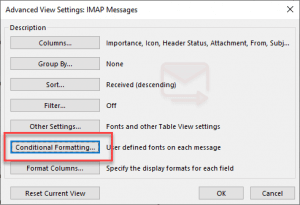
- Then the Advance view setting dialog box pops up here Click conditional formatting.
- Now the Advanced View Settings window lets you customize the folder view. Click the ‘Conditional Formatting’ button.
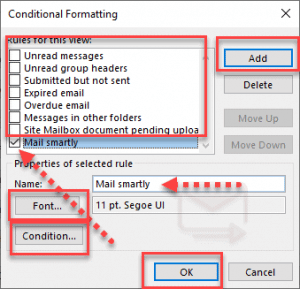
- The next step brings you to set up the conditional formatting rule, which will apply to all the existing messages in your folder and for the upcoming inflow.
- Here are some of the default options already available for conditional formatting, in our scenario you need to create one, Hit Add name your rule, select your rule, and click font, (it will allow you to change the font, color, effects, and complete visibility of your desired email message.
- Now here click a condition (this steps is very important), Filter named dialog box appears.
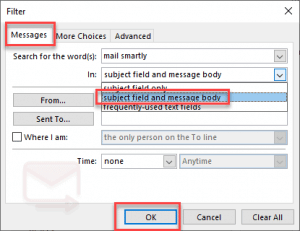
- Then click messages in the filter dialog box and Enter your specific word(s) in the “Search for the word(s)” bar
- After that select “Subject field and message body” from the in the dropdown list: – which consists of three options (1) subject filed only, (2) Subject field and the message body, & (3) frequently used text fields.
- Also you can enter the email address or domain address followed by “@” sign, if you required your formatting from a specific email address, but in our case, left it blank to get your text “mail smartly” related emails to grab the list.
- Finally you are done simply click , ok
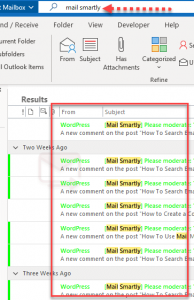
All set! How Conditional Formatting In Outlook, check that your conditional formatting is working properly using “your keyword” in the search bar. If all goes well you should see results turn red/green
This tutorial, along with additional instructions for other Message List features has been helpful to users.

Hello, My name is Shari & I am a writer for the ‘Outlook AppIns’ blog. I’m a CSIT graduate & I’ve been working in the IT industry for 3 years.
